Showing posts with label Recipes. Show all posts

Saturday, June 14, 2014

World Cups and Kotlovina

The 2014 World Cup kicked off this Thursday with a rousing and questionably refereed game between Croatia and Brazil. In our house, and in our church, too, come to think of it, the World Cup ushers in about a month of excited conversation, sporadic shouts of glee or frustration, and general Football craze. It is all very lively and lovely indeed, and to make certain I do not completely abandon the sporting festivities, the Raimundo household began a fun little tradition last World Cup of following the Football schedule as our eating plan. I get to cook the foods of the countries playing any given day, we get a little geographical, gastronomical, and cultural education, and everyone gets to enjoy the World Cup as a family. Splendid solution, do you not agree?

Kotlovina
We decided to cook Croatian for the first game, and after some internet browsing and cookbook searching, I decided to try my hand at Kotlovina, a dish named for the pot-pan-spidergrillthing in which it is traditionally prepared. When Wikipedia (oh, my Wiki!) described Kotlovina as a pork knuckle stew, there was no doubt as to what we were eating Thursday night.

Kotlovina it was. But I would need pork for this meal, specifically joints, bones, chops, and sausage (I ended up nixing the sausage). Alas, the Raimundos are currently awaiting the arrival of our next half-pig from Skye Ridge Farm, so we resorted to The Organic Butcher in McLean, the next best place to buy pork in our area. An early morning call assured me there would be some succulent bones calling my name, plus a few Polyface chops which were on their way for fresh afternoon delivery. Honestly, the shopkeeper and I were mutually impressed the other knew what Polyface was. Anyway, some hours later found me soaking wet in their darling little hole in the wall, where I stumbled (I know, I'm a klutz) across some deliciously green and organic Brussels sprouts. These bright sweet cabbage-looking things are some of Jenn's favourite vegetables, and the organic kinds are a treasure to come by. Needless to say, they joined the pork on the wooden purchasing block in a heartbeat. Supper was cooking itself before my eyes!

The vehicle I was driving somehow delivered me safely home amidst torrents of rain and loud music, then I grabbed the camera, did a jig, and started cooking. My research had offered me a handful of Kotlovina recipes from which to choose; they were mostly similar, but some were more stewed and some were more fried and some were more starched and some were more veggied. You know what I mean. You also know that Jenn finds it insurmountably difficult to leave a recipe alone, so you can imagine what three recipes left me cooking. This is what happened:

Kotlovina, or, A dish from a certain part of Croatia that I can't remember the name of

Two pork shanks
Two 2-inch bone-in pork chops, a little bit more than a pound's worth
Three onions, sliced
One stalk of celery, sliced
One green or red sweet pepper, julienned
Two large ripe tomatoes, sliced
Five cloves garlic, sliced
One tablespoon paprika
A dash of hot paprika or red pepper flakes, to your liking
Two teaspoons ground mustard
Two or three cloves
A few fennel seeds
One crumbled bay leaf
A toss of the following spices: sage, oregano, thyme, parsley (we like a generous quantity of oregano)
A half cup of white wine or broth.
Real Salt, to your liking

Whew! That looks long written out, but it took me no time to throw all the seasonings in. Honest.
Since whatever Kotlovina is usually made in is usually made out of cast-iron, I used our cast-iron skillet to make the meal more authentic and to make clean-up afterwards a breeze. Double delight.

Thy pork marinates
Before cooking, season the pork with salt and pepper and let it marinade for a few hours.

Thy vegetables are chopped
But when it comes time to cook, the first task is to chop thine vegetables. You know how the Food Network people make meals in minutes? That's right. They chop all their vegetables first. I slice the onions last so the chemicals have the least time to make me cry, and by the time my onions are slicing, my pork is browning in a medium-high heat skillet. 

Thy chops are browned
Get the pork nicely browned on all sides until it smells tantalising and not burnt (you can slice your onions now). Between the skin and fat from the shanks and chops, I did not need to add any fat to accomplish the browning. However, your pork might need some help. I trust you to make the call. Once beautifully browned, remove the meat from your skillet and add the onions. Sprinkle a smidgen of salt on the onions and let them become translucent. 

Thine onions await
Proceed to toss in the rest of your vegetables and seasonings. Cook everything down a bit and stop to smell the flavors combining in a happy dance. Here's where you add your broth and/or wine. Whoosh! Don't you love that part? Your vegetables should start melting into a gorgeous mash which will serve as the perfect bed for your pork. 

The vegetables mash (and their steam gets in the way of pictures)
Thy meal is ready
Put the pork to sleep in the skillet, turn the heat down to a lulling low, and cover the skillet with a decently-fitted-lid-that-didn't-come-with-the-cast-iron. The meat should take about thirty minutes to thoroughly cook into a tender rosy gray. During this time, you may add some more broth to maintain the dish's proper mushy consistency. Then it is finished! Serve with roasted potatoes or rice and a vegetable side, such as...

They're green. They're cute. What could go wrong? 
Pan Seared Brussels Sprouts

One package of organic Brussels Sprouts, about three or four cups? I don't really know.
Pork drippings and snippings
Three garlic cloves, chopped
Water or broth
Salt and Pepper
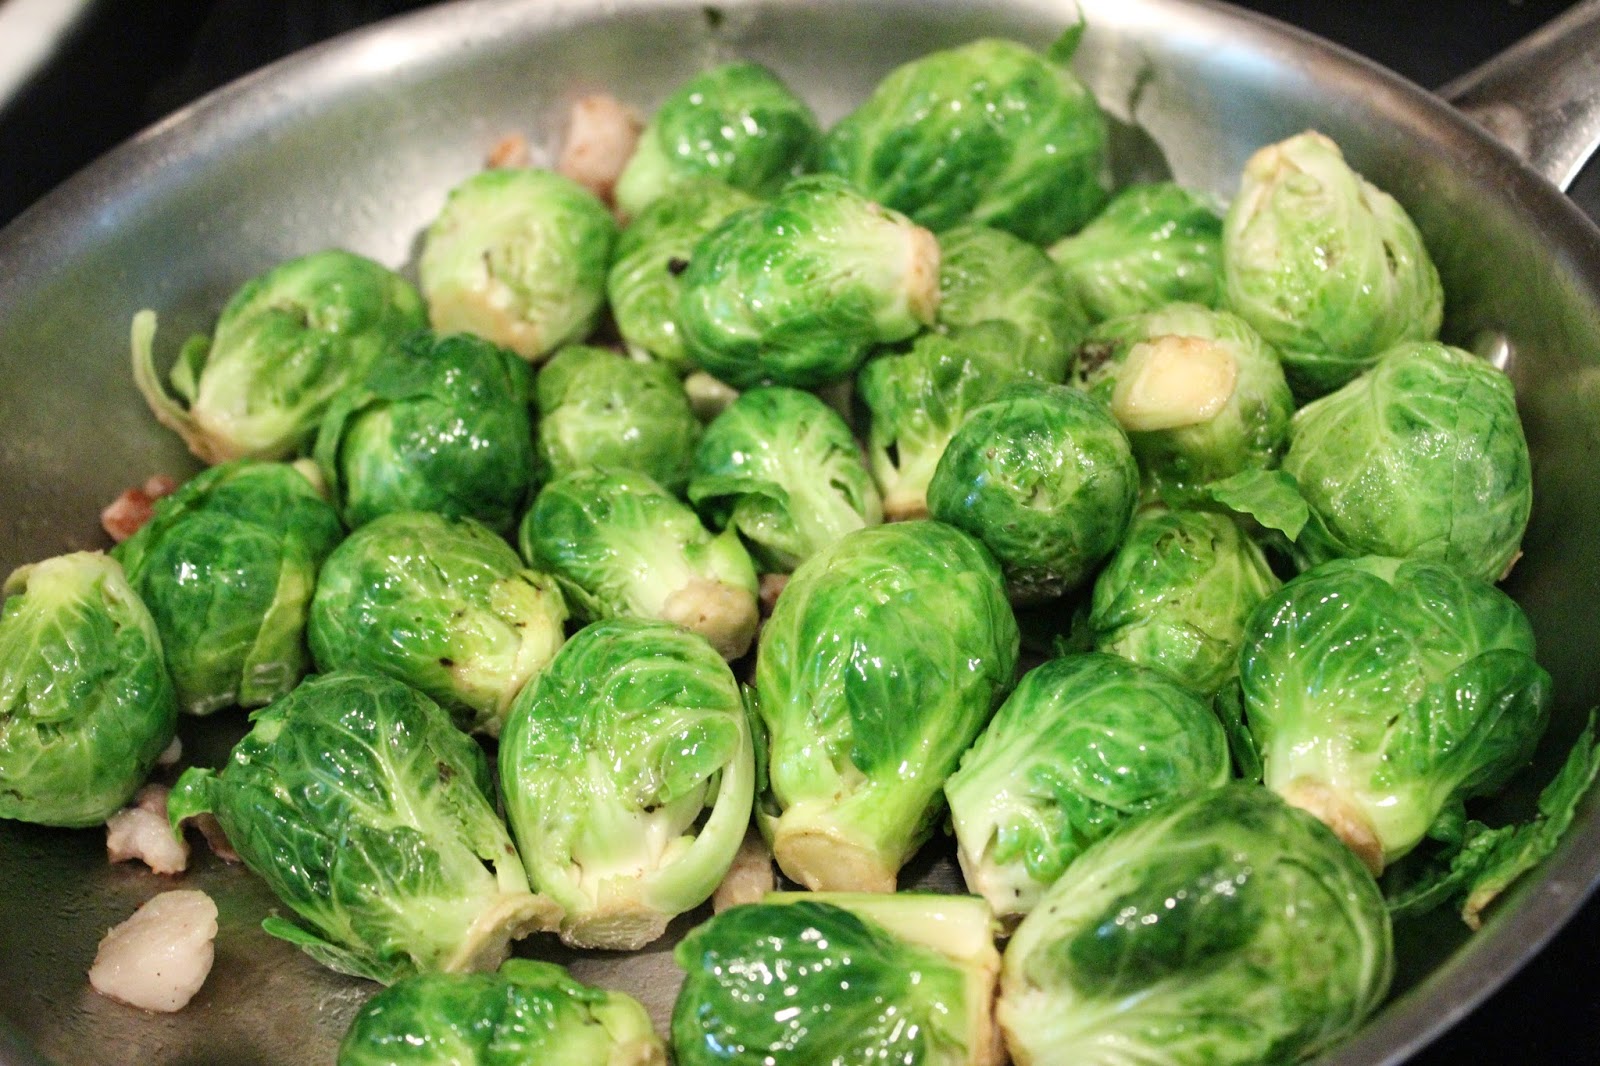
Before
Wash the sprouts and heat a pan to medium-high. Throw in the porky goodness and let it sweat a bit, then add your Brussels to the party and sprinkle with salt and pepper.  Toss the veggies around for a bit to make sure they brown but don't stick. Eventually you will need to add some water or broth so they can keep on softening without burning. About five minutes before serving, throw in the garlic and stir everything around. I truly wanted to avoid burning anything, so these Brussels sprouts took about twenty minutes to cook. After all, they are basically sweet little cabbage-cabbages.

And after
Hope you enjoy the food! I wonder for which countries we will be cooking in the final. Hmm...

P.S. This is the third time the Indiana Jones main theme has played since I began writing the post. I almost feel like Wagner would be a relief. Almost.

Friday, February 7, 2014

A Receipt for Rice, Dominican Style

Sure, I have not eaten rice in ages, but that does not mean I don't cook it. Indeed I do! For one, there are the facts that my dad hails from the Dominican Republic, Musmie grew up in South America, and my brother is...well, my brother. That equals Rice in just about anyone's books. But then there is my take on the matter; viz., that fruity fragrance of fluffy whiteness simmering away in an old pot with its bent lid, the sounds of the crackling, then the drip drip of the condensed steam pattering atop the grains, the pale little heap of snow-like yumminess crying out for a sauce to cover and protect it. Rice. So sweet.

I suppose years without rice allows one to romanticise a bit, right? Okay, so maybe I like that it cooks up in 20 minutes and you can slap it against basically any thing and call it a complementary side. Romanticism has its practical moments, too.

Still, there is the question of how to cook it. I remember the first time I saw an American family prepare rice. 'Twas shocking. Sand-coloured kernels poured into a bigblackthing (I later discovered this was a "rice cooker" [which always reminds me of "pressure cookers" {which is not a good thing because don't we have enough pressure already?}]) with a lid screwed or heaved or pressed on a metal tub as tight as possible, like something out of B.F. Skinner. Up flipped a switch, on came a bright light, and that was it. No crackles, no pitter-patter, and no innocent whiteness. 'Twas sad.

Don't get me wrong. Since then, I have come to love the earthy, nutty brown texture and flavour of brown rice. But this post shall not be weighing the nutritional or gastronomical pros and cons of brown and white rice. This is simply, and unabashedly, a recipe for white rice, the way I was grown-up to love it.

(In case you were wondering, I have yet to reconcile with the rice cooker. But that's okay, weaker brothers, Christian liberty, and all that jazz. ;))


~ 2-4 Tablespoons cooking fat. Use a good olive oil or lard for this one, the only exception being if you are planning on serving this with an Asian dish, in which coconut oil is allowed. Otherwise, olive oil or lard is your best bet. (I save butter and bacon fat for brown rice ~ oh, so good!)
~ 2 cups white rice, whether Basmati or Jasmine, or Long-Grain. Dad likes Basmati, Musmie likes Jasmine, and my brother likes Long-Grain. Yeah, it's an interesting life. 
~ 3 cups water
~ 2-3 teaspoons unrefined sea salt (the Real stuff, ya know). 

A grain, an oil, a salt, and some water. You have to appreciate the simplicity of thing. 

The first step is to maneuver and wriggle out a medium-sized, wide-and-heavy-bottomed pot with matching lid. Peaceful music might be required, unless you are one of those sane people who keep their most-used pots and pans at the front of their cupboards. *cough*

Then place the pot/pan/thing on a working burner and turn the heat to medium-highish. Spoon in your oil or lard and, while it is heating up, measure out your two cups of rice. Take care not to let your fat burn (smoke). Dash in thy rice and stir the little dearies so that they are well coated in the oil or lard. 

See? Dashed and stirred and well-coated wee little white things.
While the rice is having a jolly time sautéing in the pot, measure three cups of water and have it near to hand, poised and ready for just the right moment. That moment will come when the rice grains have transferred from translucent to solid white, and an unmistakably tantalizing smell crescendos in the kitchen. That is when your water must strike.
Solid white. Add the water. Now.
Dousssssssssse! That simmering sound have I always rather relished. Anyway, throw in the salt and give the rice a last quick stir and cover the pot with its lid.
Now, about the lid. My lid, as I have aforementioned, is bent so that there are little spaces between pot and lid where air can escape. This is intentional, and if your lid does not twist and turn as does mine, then you need to leave your pot open a crack. Just knock the lid off-center as if you were upset with your CDO sister. There. Now your rice will have the perfect texture.
Waiting to be bonneted.
The next thing to do is to get going on whatever else it is you are making for supper. Wash the lettuce, check the meat, taste the soup, just don't leave the kitchen and don't stare at the pot. In a few short minutes, you will sense (see steam and hear bubbles) that the rice water has come to a boil. Without opening the lid, turn the heat down to plain old medium. Get back to preparing thine other vittles. Keep your ears sharp.

In ten to fifteen minutes, you will start hearing a drip-snazzz, drip-snazzzz, drip-snazzzzz. I know, best part of the whole evening. The engaging sound you are hearing is the steam of the water hitting the lid and condensing into drops right before it snazzles back onto the hot pan. Now, remove the lid and what should meet your eyes is this:
Air pockets!
There should be little sink holes in your rice. I have no clue why this happens. It just does. If your ear has not yet been accustomed to picking up on the drip-snazzz sequence, simply sequester the pot lid after ten minutes of lowering the heat to medium, and check to see if "soupy rice" has become "air pocket" rice. If you are still in the "soupy rice" stage, just recover the pot and wait another few minutes. (No, it won't kill the rice or the flavour or the texture to uncover the pot before time. It will survive.) Once the rice has reached sink-hole mania, however....
The Well
...It is time to make The Well. Uncover your pot and leave it uncovered for the remainder of this program. Take your cooking spoon (spatula, stick) and push most of the rice to the sides of the pot, leaving a well in the centre with a thin layer of rice at the bottom. This is how one creates that Dominican dainty, con con. Don't ask me about the etymology on that one. Jenn has no idea, and I don't think any Dominican has the faintest, either. Nevertheless, con con is an epicurean delight, and it is the crunchy bit of browned rice located at the bottom of any good Dominican cook's rice pan. One spoons out the regular rice into a serving dish, and then scrape, scrape, scrapes out the con con to serve it on the side. Oh, my, so good. Which is why I am teaching you how to make it.

So, The Well. You made The Well and now you are going to put the heat back onto medium-high and wait for the 3-5 minutes it takes for the skin of rice to become golden and crunchable. Watch the transformation.
See the honey-hued rice at the bottom?
Can you see it now?
And that's con con. Shift all the rice back into its proper place (as in, mess up The Well), and serve the rice and con con with your meal.
An especially edible pot of white fluffiness.
This rice with a vegetable, a meat, and a sauce combine for a scrumptious meal. Enjoy!

Photos again, obviously, by Yours Truly. I really need to do my camera better justice. Ahem.

Friday, August 30, 2013

I've Got a Lovely Bunch of Coconut Muffins


I had just come from a beautiful time at a wedding in another state, and was about to drive to someone else's wedding in another country. Jenn was excited. Jenn was inspired. Jenn was downright tired. And, you may not know this, but that means that Jenn was singing Disney songs...and getting the baking bug. 
So the night before her family packed up and drove to Canadia, Jenn started the soaking process for a lovely bunch of coconut muffins. 
And, in case you find yourself lodged in between three countries, two weddings, and less sleep than you can shake a stick at (nope, never understood that phrase), Jenn is sharing her recipe concoction with you so you can go coconut crazy, too. 

~1-1/2 cups whole wheat pastry flour
~1/2 cup rolled oats
~2 tablespoons raw apple cider vinegar or Kombucha + 1 cup full-fat coconut milk. 

Mix above ingredients together, and let soak for about 12 hours in a bowl covered with a towel. I usually do this at night so that the muffins can be baked in the morning. But you can always soak it in the morning and then bake the muffins at night. You work with your schedule, deal?
But, whenever you do decide to bake your lovely bunch of coconut muffins, begin the baking session by turning your oven on Bake (imagine that) to 375 degrees F. 
Take a bit more than a half cup of coconut oil and melt it on the stove on medium. Save half a cup of the melted coconut oil for the next step, but, for now, grab a tablespoon or two of the melted oil to grease a muffin tin. Believe me, do this step at the beginning and you will thank me at the end. 

Then....

~2 local, pastured eggs
~1/2 cup evaporated cane juice or Sucanat or other solid natural sweetener (powder in food processor if coarse)
~1 teaspoon vanilla
~1/2 cup virgin, unrefined coconut oil (melted if solid at room temperature)

Mix the eggs, sweetener, and vanilla in a bowl, slowly pouring in the melted coconut oil as you stir. You are stirring in the coconut oil slowly in order to prevent its heat from pre-cooking the batter. 

~2 teaspoons cinnamon
~1/2 teaspoon freshly-ground cloves
~3/4 teaspoon nutmeg
~1 teaspoon sea salt
~2 teaspoons aluminum-free baking powder

Now you get to whisk the spices and thatthingthatmakesthemuffinsrise into the egg mixture. Whisk well! And smell but do not touch! Mmm. Yeah, you know this is going to be a lovely bunch of coconut muffins, for sure.
After you have enjoyed the fragrance of this merry concoction, and once the egg/spice mixture is thoroughly whisked, add said whisked mixture to your bowl of soaked wheat, oats, and coconut cream. Stir until you have a pretty homogeneous mixture, but take care not to over-stir. Good! Now you have yourself a muffin batter.

~1/2 cup dried cranberries
~1/2 cup chopped cashews, preferably soaked.
~1/2 cup unsweetened shredded coconut

Stir these last three yumminesses into your batter, and guess what? Thou hast just made a lovely bunch of coconut muffins! Almost.

Fill the greased muffin tin with your muffin batter and bake at 375 degrees for about 20-25 minutes. You know the drill: stick a toothpick in the center of the center muffin to see if the toothpick comes out clean. When it does, you know the muffins are done. But, you know what? I think you can tell by the smell and the colour of the muffins. When the kitchen has this delicious aroma wafting in the air and your muffins are this beautiful toasty golden brown colour, you know they are ready to pop out of the oven. 

Whenever the muffins are ready, remove muffin tin from the oven and let it cool for about ten minutes before eating or storing the muffins (yeah right!).

And now you have yourself a lovely bunch of coconut muffins, perfect for taking on road trips, eating as a part of breakfast, or turning them into a special snack while you nostalgically watch Disney's The Lion King!

*While the recipe is definitely customised, Wardeh from Gnowfglins gets the credit for the basic recipe. 

Tuesday, December 6, 2011

Rosy and Sweet Cranberry Salad (GAPS Stage 5-6 legal)


Looks festive, does it not? The jeweled fuchsia colour is matched by a refreshing sweet tang, perfect to offset your holiday feasting. And, in my opinion, those shades of blue and pink are smashing together! 
The recipe is part innovation, invention, and tradition. My favourite combination. I served this as an accompaniment to our Thanksgiving meal and, since Christmas is fast approaching, this dish won blog status for its celebratory-ness. Now, I have never tried it because I am off fruit for the time being, but it sure smelled and looked lovely, and the grins it received spoke in this sauce’s favour. Hope you like it as much as my family did!
*Remember to buy organic and local whenever possible. It makes for a tastier dish and healthier body!
Rosy and Sweet Cranberry Salad
  • 2 cups fresh cranberries, or a 12 ounce bag
  • One pear, washed
  • One apple of desired variety, washed
  • One orange, peeled
  • 1/3 - 1/2 cup raw honey. 
  • 2 dashes cinnamon
  • One dash each of nutmeg and ground cloves
Method:
Place fruit and spices in a food processor. Have fun with the dashes. Cover food processor (ahem) and run on regular speed. With the processor whirring, add honey in a steady stream until incorporated and fruit looks like a tantalizing smoothie. Taste and adjust flavours as needed. Pour into jars with sweet little lids and enjoy! Can be refrigerated for a week.
* Next time I will try zesting the orange before peeling and add the zest to the mix, too. Please comment if you have any other modifications!


This post is linked to Real Food Wednesdays