Showing posts with label GAPS Recipes. Show all posts

Saturday, June 14, 2014

World Cups and Kotlovina

The 2014 World Cup kicked off this Thursday with a rousing and questionably refereed game between Croatia and Brazil. In our house, and in our church, too, come to think of it, the World Cup ushers in about a month of excited conversation, sporadic shouts of glee or frustration, and general Football craze. It is all very lively and lovely indeed, and to make certain I do not completely abandon the sporting festivities, the Raimundo household began a fun little tradition last World Cup of following the Football schedule as our eating plan. I get to cook the foods of the countries playing any given day, we get a little geographical, gastronomical, and cultural education, and everyone gets to enjoy the World Cup as a family. Splendid solution, do you not agree?

Kotlovina
We decided to cook Croatian for the first game, and after some internet browsing and cookbook searching, I decided to try my hand at Kotlovina, a dish named for the pot-pan-spidergrillthing in which it is traditionally prepared. When Wikipedia (oh, my Wiki!) described Kotlovina as a pork knuckle stew, there was no doubt as to what we were eating Thursday night.

Kotlovina it was. But I would need pork for this meal, specifically joints, bones, chops, and sausage (I ended up nixing the sausage). Alas, the Raimundos are currently awaiting the arrival of our next half-pig from Skye Ridge Farm, so we resorted to The Organic Butcher in McLean, the next best place to buy pork in our area. An early morning call assured me there would be some succulent bones calling my name, plus a few Polyface chops which were on their way for fresh afternoon delivery. Honestly, the shopkeeper and I were mutually impressed the other knew what Polyface was. Anyway, some hours later found me soaking wet in their darling little hole in the wall, where I stumbled (I know, I'm a klutz) across some deliciously green and organic Brussels sprouts. These bright sweet cabbage-looking things are some of Jenn's favourite vegetables, and the organic kinds are a treasure to come by. Needless to say, they joined the pork on the wooden purchasing block in a heartbeat. Supper was cooking itself before my eyes!

The vehicle I was driving somehow delivered me safely home amidst torrents of rain and loud music, then I grabbed the camera, did a jig, and started cooking. My research had offered me a handful of Kotlovina recipes from which to choose; they were mostly similar, but some were more stewed and some were more fried and some were more starched and some were more veggied. You know what I mean. You also know that Jenn finds it insurmountably difficult to leave a recipe alone, so you can imagine what three recipes left me cooking. This is what happened:

Kotlovina, or, A dish from a certain part of Croatia that I can't remember the name of

Two pork shanks
Two 2-inch bone-in pork chops, a little bit more than a pound's worth
Three onions, sliced
One stalk of celery, sliced
One green or red sweet pepper, julienned
Two large ripe tomatoes, sliced
Five cloves garlic, sliced
One tablespoon paprika
A dash of hot paprika or red pepper flakes, to your liking
Two teaspoons ground mustard
Two or three cloves
A few fennel seeds
One crumbled bay leaf
A toss of the following spices: sage, oregano, thyme, parsley (we like a generous quantity of oregano)
A half cup of white wine or broth.
Real Salt, to your liking

Whew! That looks long written out, but it took me no time to throw all the seasonings in. Honest.
Since whatever Kotlovina is usually made in is usually made out of cast-iron, I used our cast-iron skillet to make the meal more authentic and to make clean-up afterwards a breeze. Double delight.

Thy pork marinates
Before cooking, season the pork with salt and pepper and let it marinade for a few hours.

Thy vegetables are chopped
But when it comes time to cook, the first task is to chop thine vegetables. You know how the Food Network people make meals in minutes? That's right. They chop all their vegetables first. I slice the onions last so the chemicals have the least time to make me cry, and by the time my onions are slicing, my pork is browning in a medium-high heat skillet. 

Thy chops are browned
Get the pork nicely browned on all sides until it smells tantalising and not burnt (you can slice your onions now). Between the skin and fat from the shanks and chops, I did not need to add any fat to accomplish the browning. However, your pork might need some help. I trust you to make the call. Once beautifully browned, remove the meat from your skillet and add the onions. Sprinkle a smidgen of salt on the onions and let them become translucent. 

Thine onions await
Proceed to toss in the rest of your vegetables and seasonings. Cook everything down a bit and stop to smell the flavors combining in a happy dance. Here's where you add your broth and/or wine. Whoosh! Don't you love that part? Your vegetables should start melting into a gorgeous mash which will serve as the perfect bed for your pork. 

The vegetables mash (and their steam gets in the way of pictures)
Thy meal is ready
Put the pork to sleep in the skillet, turn the heat down to a lulling low, and cover the skillet with a decently-fitted-lid-that-didn't-come-with-the-cast-iron. The meat should take about thirty minutes to thoroughly cook into a tender rosy gray. During this time, you may add some more broth to maintain the dish's proper mushy consistency. Then it is finished! Serve with roasted potatoes or rice and a vegetable side, such as...

They're green. They're cute. What could go wrong? 
Pan Seared Brussels Sprouts

One package of organic Brussels Sprouts, about three or four cups? I don't really know.
Pork drippings and snippings
Three garlic cloves, chopped
Water or broth
Salt and Pepper
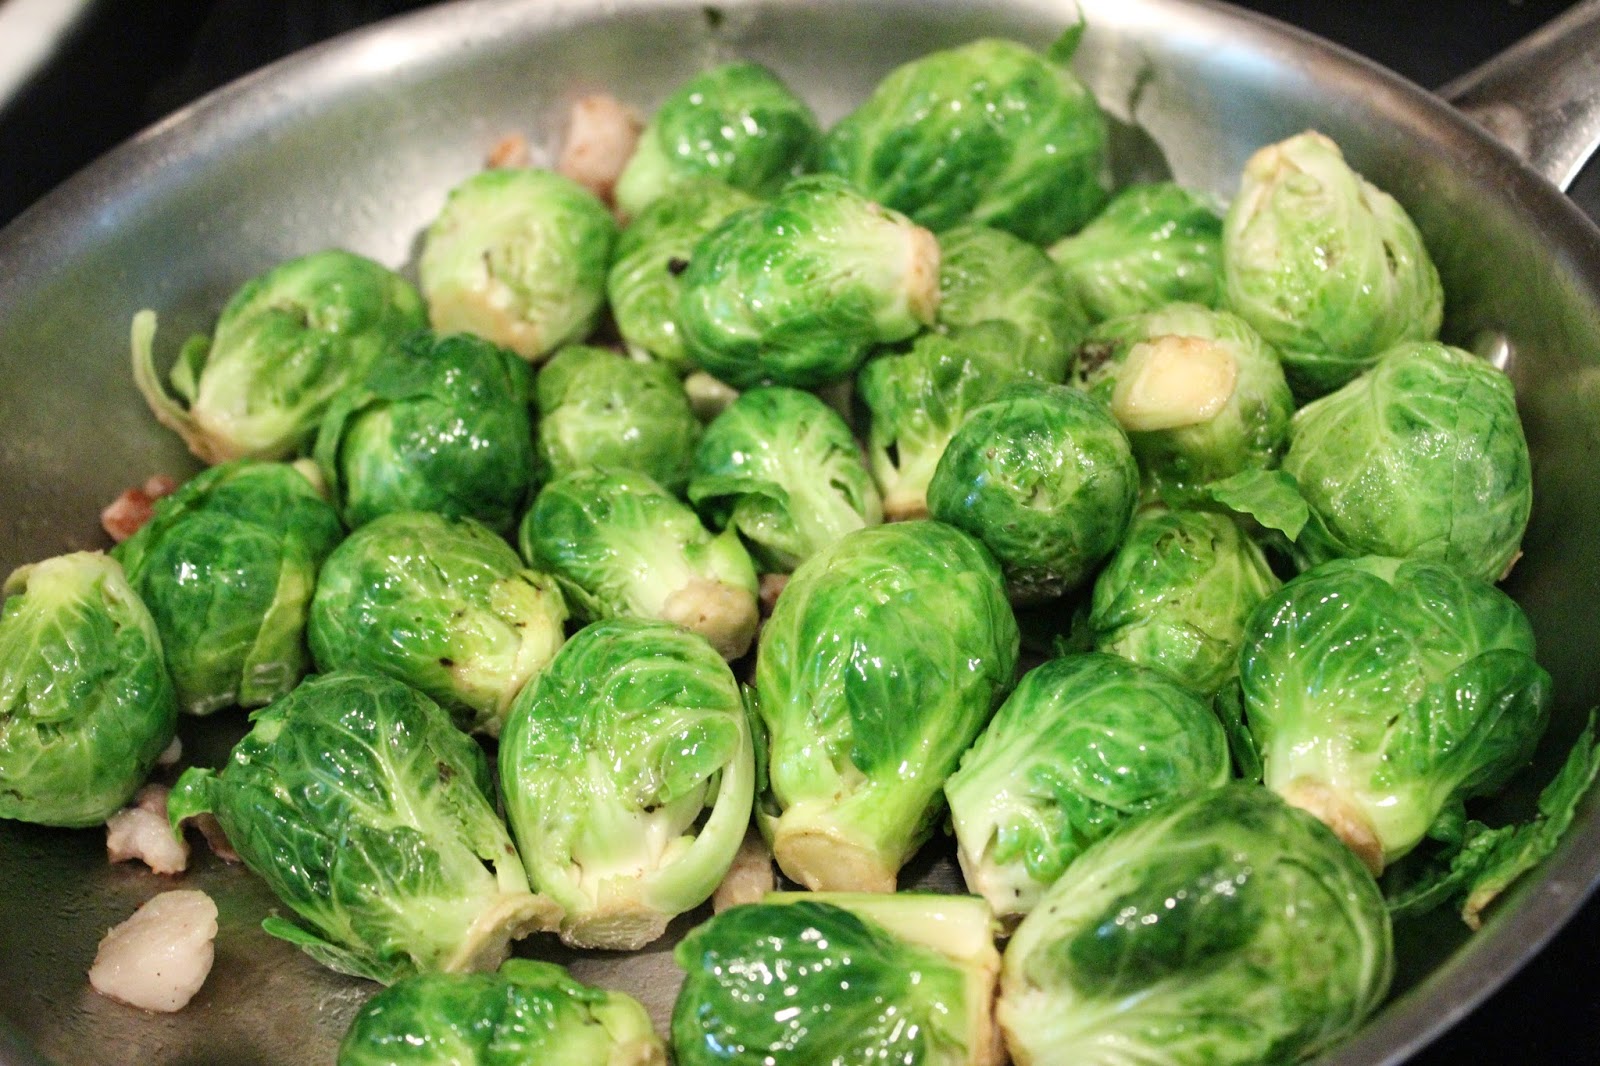
Before
Wash the sprouts and heat a pan to medium-high. Throw in the porky goodness and let it sweat a bit, then add your Brussels to the party and sprinkle with salt and pepper.  Toss the veggies around for a bit to make sure they brown but don't stick. Eventually you will need to add some water or broth so they can keep on softening without burning. About five minutes before serving, throw in the garlic and stir everything around. I truly wanted to avoid burning anything, so these Brussels sprouts took about twenty minutes to cook. After all, they are basically sweet little cabbage-cabbages.

And after
Hope you enjoy the food! I wonder for which countries we will be cooking in the final. Hmm...

P.S. This is the third time the Indiana Jones main theme has played since I began writing the post. I almost feel like Wagner would be a relief. Almost.

Thursday, February 2, 2012

Yogurt from the Old Homestead (GAPS legal)

   There are many things that worried me as I prepared to start the GAPS diet, not the least of which was the fact that I had to ferment dairy. Ferment dairy? Does that sound foreign only to me? I already felt accomplished making my own kraut, crispy nuts, and dehydrating our wonderful fruit harvest. But dairy...dairy goes bad. 
   
   Yet, I pushed through the doubts, mustered my courage, and read a lot of blog posts. Oh, yes, there are plenty of posts about yogurt making, but I have been asked for these directions enough times to justify adding another post to the mysterious world of culturing milk. I included pictures for all you visual people, but there be warned: just because my uncle is a professional photographer, does not make me one! If you want eye-candy, go to his website, not mine!

   To start making your own yogurt and sour cream, ensure you have a big pot, the thinner metal the better; a large bowl wide enough for your pot to rest in it; a calibrated thermometer; jars with their lids; a starter, culture, etc.; and some time.

   Now, I use raw milk, which means the milk has not been pasteurized, killing all the beneficial microbes naturally found in milk and distorting its protein structure. For many years, however, we could not get our hands on this white gold, so we had to settle for store-bought milk. You can make yogurt with this, too. Never fear.

I use one gallon of milk, one quart of light cream, and one quart of heavy cream. Yum!

   The first step requires heating the milk. Yes, even though your lovely milk is raw, heat the milk. With raw milk, you warm it to a gentle 110 degrees Fahrenheit. Please note, your milk is still technically raw. Why heat it then, you ask? Good question. Raw milk is full of lively microbes, but there are many different strains of these probiotics present, and they will compete during the culturing process. The yogurt will end up tasting odd and may very well separate in to curds and whey. Unpleasantness, especially after spending this time and money on yogurt. Heating the milk to 110 degrees controls the levels of probiotics so competition is not as rampant, making the yogurt sour nicely and develop a thick, silky texture. And remember, all this and your milk is still raw!

   If you cannot use raw milk, then buy organic, full fat, low temperature pasteurized milk from the store. If you can get it unhomogenized, consider yourself blessed. Read carefully, now. Instead of heating your milk to 110 degrees, heat it to 180 degrees. Why? Well, sorry to say, since the milk was pasteurized at the factory, it lost its natural protection from invading microbes: its own probiotics. Sigh. Tragic. Why did they do this in the first place? Anyway, your milk is now contaminated with some pestulant flora, and we do not want them growing during the fermentation process. Heating it to 180 degrees kills all the beasties in the milk so none of them propogate later on. The microbes you will use to culture your milk will come from the starter you use in a later step.

White, foamy beauty waiting docilely in a pot.

      So, pour your milk in the pot, cover it with any lid you can find the correct lid, and turn the burner to medium high. Stay in the kitchen while the milk warm because we do not want to overheat or burn it. With my thin metal pot, I generally check the milk about seven minutes in to the heating process and it is almost at 110 degrees. Of course, if you are using non-raw milk, it will take longer to reach 180 degrees.
Checking the temperature. Sorry about the blur!

   While the milks warms, procure a wide, sturdy bowl and place it on a flat surface. This will later be holding your pot of milk along with some ice.

   Always keeping an eye on the milk on the stove, fetch enough jars to hold your milk and cream (a gallon of milk requires four quart jars, plus however many jars you need for your cream), and cover the bottom of each jar with your starter. What could your starter be? Well, any probiotic food or capsule, really. People have had success with using their probiotic pill, others prefer using some of their last batch of yogurt, some get fancy and order starters online, while still others, like me, buy organic yogurt from the store and use it as their culture. Do what works best for you. With raw milk yogurt, many find that using yogurt from their previous batch results in really sour yogurt due to the wider variety of probiotic strains with which you are working. I tried it once, and the taste definitely had to grow on us. My general practice is to buy organic, full fat, unhomogenized yogurt from the store or farmer's market to use as my starter. The farmer's market yogurt makes our yogurt so creamy in taste - delicious! Unfortunately, we do not get over there often, so we resort to Erivan yogurt from Whole Foods. Erivan is only found on the east coast, so do your research and see which starter is best for you!

You see how I cover the bottom with my starter yogurt? It is about 1/4 cup starter to 4 cups milk.

   Forget not thy milk warming on the stove. That would bring about no pleasant happening, now would it? Do not fret if you do happen to heat past the 110 degree mark. The yogurt is not going to be ruined, and you will still enjoy the benefits of the bacteria from your starter yogurt. In fact, the yogurt will be thicker the more you heat it because there will be less competing strains. And if you are not using raw milk and you miss the 180 degree mark, hey, your milk is dead anyway. 

   Once you hit 110 or 180 degrees, depending on your milk, immediately transfer the pot of milk to that wide bowl mentioned above. Take of the lid of the milk pot and fill the wide bowl with ice and some water, making sure to leave room in the bowl for melting. There. Now your set up should like this:

The bowl is wide enough to fit the pot and ice water. Remember to leave room for melting ice if you do not want to deal with Niagara falls all over your kitchen counters!

   Leave the milk in the bowl until the temperature goes down to 80 degrees. Once it reaches 80 degrees, you will fill the jars with your milk, but for now, just be patient until it cools all the way. In the meantime, take your cream (which you did not heat) and pour them into a few jars with starter yogurt on the bottom. Take a spoon and stir the starter into the cream. That is all you need to do for sour cream! By now, your milk should be cooled...

Checking the temperature. Still a bit more to go until 80 degrees!

 
   Has your milk cooled down to 80 degrees? Good! Only a few more steps to go until creamy goodness. Carefully pour the milk into your prepared jars. Get a long spoon and stir the milk into the starter, as you did with the cream above. Gather all your lids and screw them on the filled and stirred jars. You should have something looking like this:

That was not so bad, was it?

   And into the dehydrator they go! Or not. We use a dehydrator to culture our dairy, but you may not have one. (Hint: if you are on the GAPS diet, I highly recommend one as almost absolutely necessary.) If that is the case, a crockpot on low has worked, as has the warming drawer which comes with some ovens nowadays. But, did you know people have been fermenting dairy long before ovens and dehydrators were invented? That is right! Fermenting is not an exacting science. If you have a water closet or an area near heating vents, or even on top of your fridge - any place with a steady temperature around one hundred degrees - feel free to use it. In our family, we pop it in the dehydrator at 100 degrees Fahrenheit for 24 hours. Whatever you use to culture your milk, be sure it is at a temperature around 100 degrees and for at least 24 hours. Not hard, eh? Here are our babies in the dehydrator. See the smaller cream jars in the front?

I see eight jars!

   Whew. Feeling overwhelmed? Do not worry, it gets easier every time and, in reality, there is not that much to it. Just develop a rhythm: warm milk, cool milk, pour milk, and do not spill! Here is a review of the directions:

1. Heat milk to 110 degrees.
2. Make sure your large bowl is handy.
3. As soon as milk reaches 110 degrees, place milk pot in bowl, fill with ice water, and cool to 80 degrees.
4. While cooling, prepare jars with a quarter cup starter per quart jar.
5. Once milk reaches 80 degrees, pour into jars and stir. Seal lids.
6. Place in dehydrator at 100 degrees for 24 hours.
7. Remove from dehydrator, stir each jar and let cool down in fridge. 

   Voila! You have just made your own yogurt. Enjoy!

*For all you GAPSters, this yogurt is perfectly legal at any stage in which you can tolerate yogurt. It has been fermenting for 24 hours, so there are no milk sugars (lactose) left, only probiotic scrumptiousness.

Tuesday, December 6, 2011

Rosy and Sweet Cranberry Salad (GAPS Stage 5-6 legal)


Looks festive, does it not? The jeweled fuchsia colour is matched by a refreshing sweet tang, perfect to offset your holiday feasting. And, in my opinion, those shades of blue and pink are smashing together! 
The recipe is part innovation, invention, and tradition. My favourite combination. I served this as an accompaniment to our Thanksgiving meal and, since Christmas is fast approaching, this dish won blog status for its celebratory-ness. Now, I have never tried it because I am off fruit for the time being, but it sure smelled and looked lovely, and the grins it received spoke in this sauce’s favour. Hope you like it as much as my family did!
*Remember to buy organic and local whenever possible. It makes for a tastier dish and healthier body!
Rosy and Sweet Cranberry Salad
  • 2 cups fresh cranberries, or a 12 ounce bag
  • One pear, washed
  • One apple of desired variety, washed
  • One orange, peeled
  • 1/3 - 1/2 cup raw honey. 
  • 2 dashes cinnamon
  • One dash each of nutmeg and ground cloves
Method:
Place fruit and spices in a food processor. Have fun with the dashes. Cover food processor (ahem) and run on regular speed. With the processor whirring, add honey in a steady stream until incorporated and fruit looks like a tantalizing smoothie. Taste and adjust flavours as needed. Pour into jars with sweet little lids and enjoy! Can be refrigerated for a week.
* Next time I will try zesting the orange before peeling and add the zest to the mix, too. Please comment if you have any other modifications!


This post is linked to Real Food Wednesdays